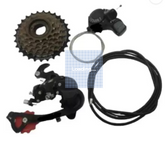
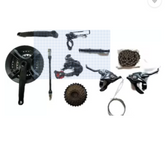
A gear cycle conversion kit is designed to upgrade a regular non-geared bicycle (single-speed) into a geared bike. It allows the rider to shift between different gears, improving the bike’s performance on varied terrain and enabling a more efficient ride, especially on hills or for long distances.
These kits typically include all the components needed to convert a single-speed bike into a multi-speed bike. Below are the key components and steps involved in a gear cycle conversion kit and how it works:
Components of a Gear Cycle Conversion Kit
The core components required for converting a single-speed bicycle to a geared bicycle include the following:
1. Front Derailleur
-
Description: The front derailleur is responsible for shifting the chain between the chainrings (the gears located at the front of the bike). It moves the chain from one chainring to another, typically allowing you to shift between 2 or 3 chainrings on the front crankset.
-
Types:
-
Top Pull: Most common on bikes with a top cable routing system.
-
Bottom Pull: Used in some older bikes where the cable enters from the bottom.
-
Side Pull: Found on some older or specialized bikes.
2. Rear Derailleur
-
Description: The rear derailleur shifts the chain across the cassette (the gear cluster on the rear wheel). It moves the chain across the different cogs, allowing the rider to change gears at the back.
-
Types:
-
Short Cage: For bikes with fewer gears.
-
Medium Cage: Used for bikes with a wider gear range.
-
Long Cage: Suitable for bikes with a wide-range cassette (11-speed or higher).
3. Shifters
-
Description: The shifters are the devices you use to control the front and rear derailleurs. They are mounted on the handlebars and allow you to switch gears while riding.
-
Types:
-
Trigger Shifters: These are the most common, with separate levers for upshifting and downshifting.
-
Twist Shifters: These are rotated (like a throttle) to shift through gears, typically found on older bikes or budget models.
-
Bar-end Shifters: Mounted at the end of the handlebars, commonly found on touring bikes.
4. Chainrings and Crankset
-
Description: The chainring(s) are the large gears at the front, which the pedals connect to. The crankset is the set of arms that connect the pedals to the bike.
- A single-speed bike has only one chainring, but a geared bike typically has two or three.
-
Crankset Types:
-
Double Chainring: Two chainrings, typically used in a 2x setup (e.g., 34T/50T).
-
Triple Chainring: Three chainrings, used in a 3x setup (e.g., 22T/32T/42T).
5. Cassette/Freewheel
-
Description: The cassette (or freewheel) is the cluster of gears attached to the rear wheel. A freewheel operates similarly to a cassette but is typically a single block and may be less efficient.
-
Sizes: The cassette comes in a range of sizes, often ranging from 8-speed to 12-speed, with varying numbers of cogs (gears) to provide a wider gear range.
-
Common Gear Ratios: A typical cassette might have 11-28T or 11-32T gears, where the number represents the number of teeth on the smallest and largest cogs, respectively.
6. Chain
-
Description: The chain connects the front chainrings to the rear cassette. It must be compatible with the number of gears (speeds) on your bike.
-
Types: Chains come in different widths depending on the number of gears. A 9-speed chain is narrower than a 7-speed chain, for example.
7. Derailleur Hangers
-
Description: A derailleur hanger is the part that holds the rear derailleur in place and attaches it to the bike frame. If your bike wasn’t originally designed for gears, you may need to install a derailleur hanger as part of the conversion.
8. Cable and Housing
-
Description: The shifting cables and housing connect the shifters to the derailleurs. These cables transmit the force from the shifters to move the derailleurs, allowing the chain to shift between the gears.
-
Types:
-
Inner Cables: Typically made of steel and come in different thicknesses depending on the shifter type.
-
Cable Housing: Protects the inner cables and keeps them running smoothly. The housing is usually a plastic or metal sleeve that guides the cables.
9. Bottom Bracket (Optional)
-
Description: The bottom bracket is the part that connects the crankset to the bike frame. If the bike was previously a single-speed bike with a square taper bottom bracket, you may need to upgrade to a hollowtech or ISIS drive bottom bracket for compatibility with the new crankset.
10. Front and Rear Brake Calipers (Optional)
-
Description: If the conversion involves a change in gear ratios or if you are upgrading from cantilever to disc brakes (or vice versa), you may need to adjust or replace the brake calipers and brake levers to accommodate the gear setup.
Steps to Convert a Non-Geared Bike to a Geared Bike
-
Install the Front and Rear Derailleurs:
- Remove the existing single-speed chainring and replace it with the new multi-chainring crankset.
- Install the front derailleur and the rear derailleur to their respective locations on the bike frame.
-
Mount the Cassette/Freewheel:
- Remove the old freewheel (if there is one) from the rear wheel and replace it with the new cassette. Ensure it’s securely tightened.
-
Install the Shifters:
- Attach the gear shifters to the handlebars (either as twist or trigger shifters, depending on your choice).
-
Add the Chain:
- Install a new multi-speed chain that is compatible with the gear ratio of your conversion kit. You might need to shorten the chain to fit your bike’s size.
-
Run the Cables and Housing:
- Install the shifting cables and connect them to the front and rear derailleurs. Ensure the cables run smoothly through the cable housing to prevent friction.
-
Adjust the Derailleurs:
- Adjust the front and rear derailleurs to ensure the chain shifts smoothly between all gears.
- You will need to fine-tune the derailleur settings (cable tension, limit screws) to ensure smooth shifting.
-
Test the Gears:
- Test the conversion kit on a flat surface to ensure that all gears shift properly and the bike functions as expected.
Advantages of Using a Gear Cycle Conversion Kit
-
Improved Performance: The ability to shift gears gives you better control over the bike, especially when cycling on varied terrain like hills and flat roads.
-
Efficiency: Multi-speed setups allow you to optimize pedaling effort, making it easier to ride longer distances or tackle steeper inclines.
-
Cost-Effective: Converting an existing single-speed bike is often cheaper than purchasing a new geared bike.
-
Customization: You can choose the components that best suit your riding style, such as adjusting the gear ratio or selecting a specific type of shifter.
Things to Consider Before Converting to a Gear Cycle
-
Compatibility: Ensure that the frame and components of your bike are compatible with the conversion kit. Some bikes may not be designed to accommodate gears, especially older single-speed or fixed-gear bikes.
-
Skill Level: Converting a single-speed bike to a geared bike can be a challenging DIY project if you're unfamiliar with bike mechanics. If you're not confident in your abilities, it may be worth getting the kit installed by a professional bike mechanic.
-
Cost: While conversion kits are generally cost-effective, the price can vary depending on the components you choose. Mid-range kits can cost anywhere from $150 to $300, while higher-end kits may cost more.
Conclusion
A gear cycle conversion kit can breathe new life into your old single-speed bike, giving you the flexibility of multiple gears and enhancing your cycling experience. Whether you’re upgrading your bike for better performance, comfort, or versatility, these kits offer an affordable and efficient way to convert your ride.


